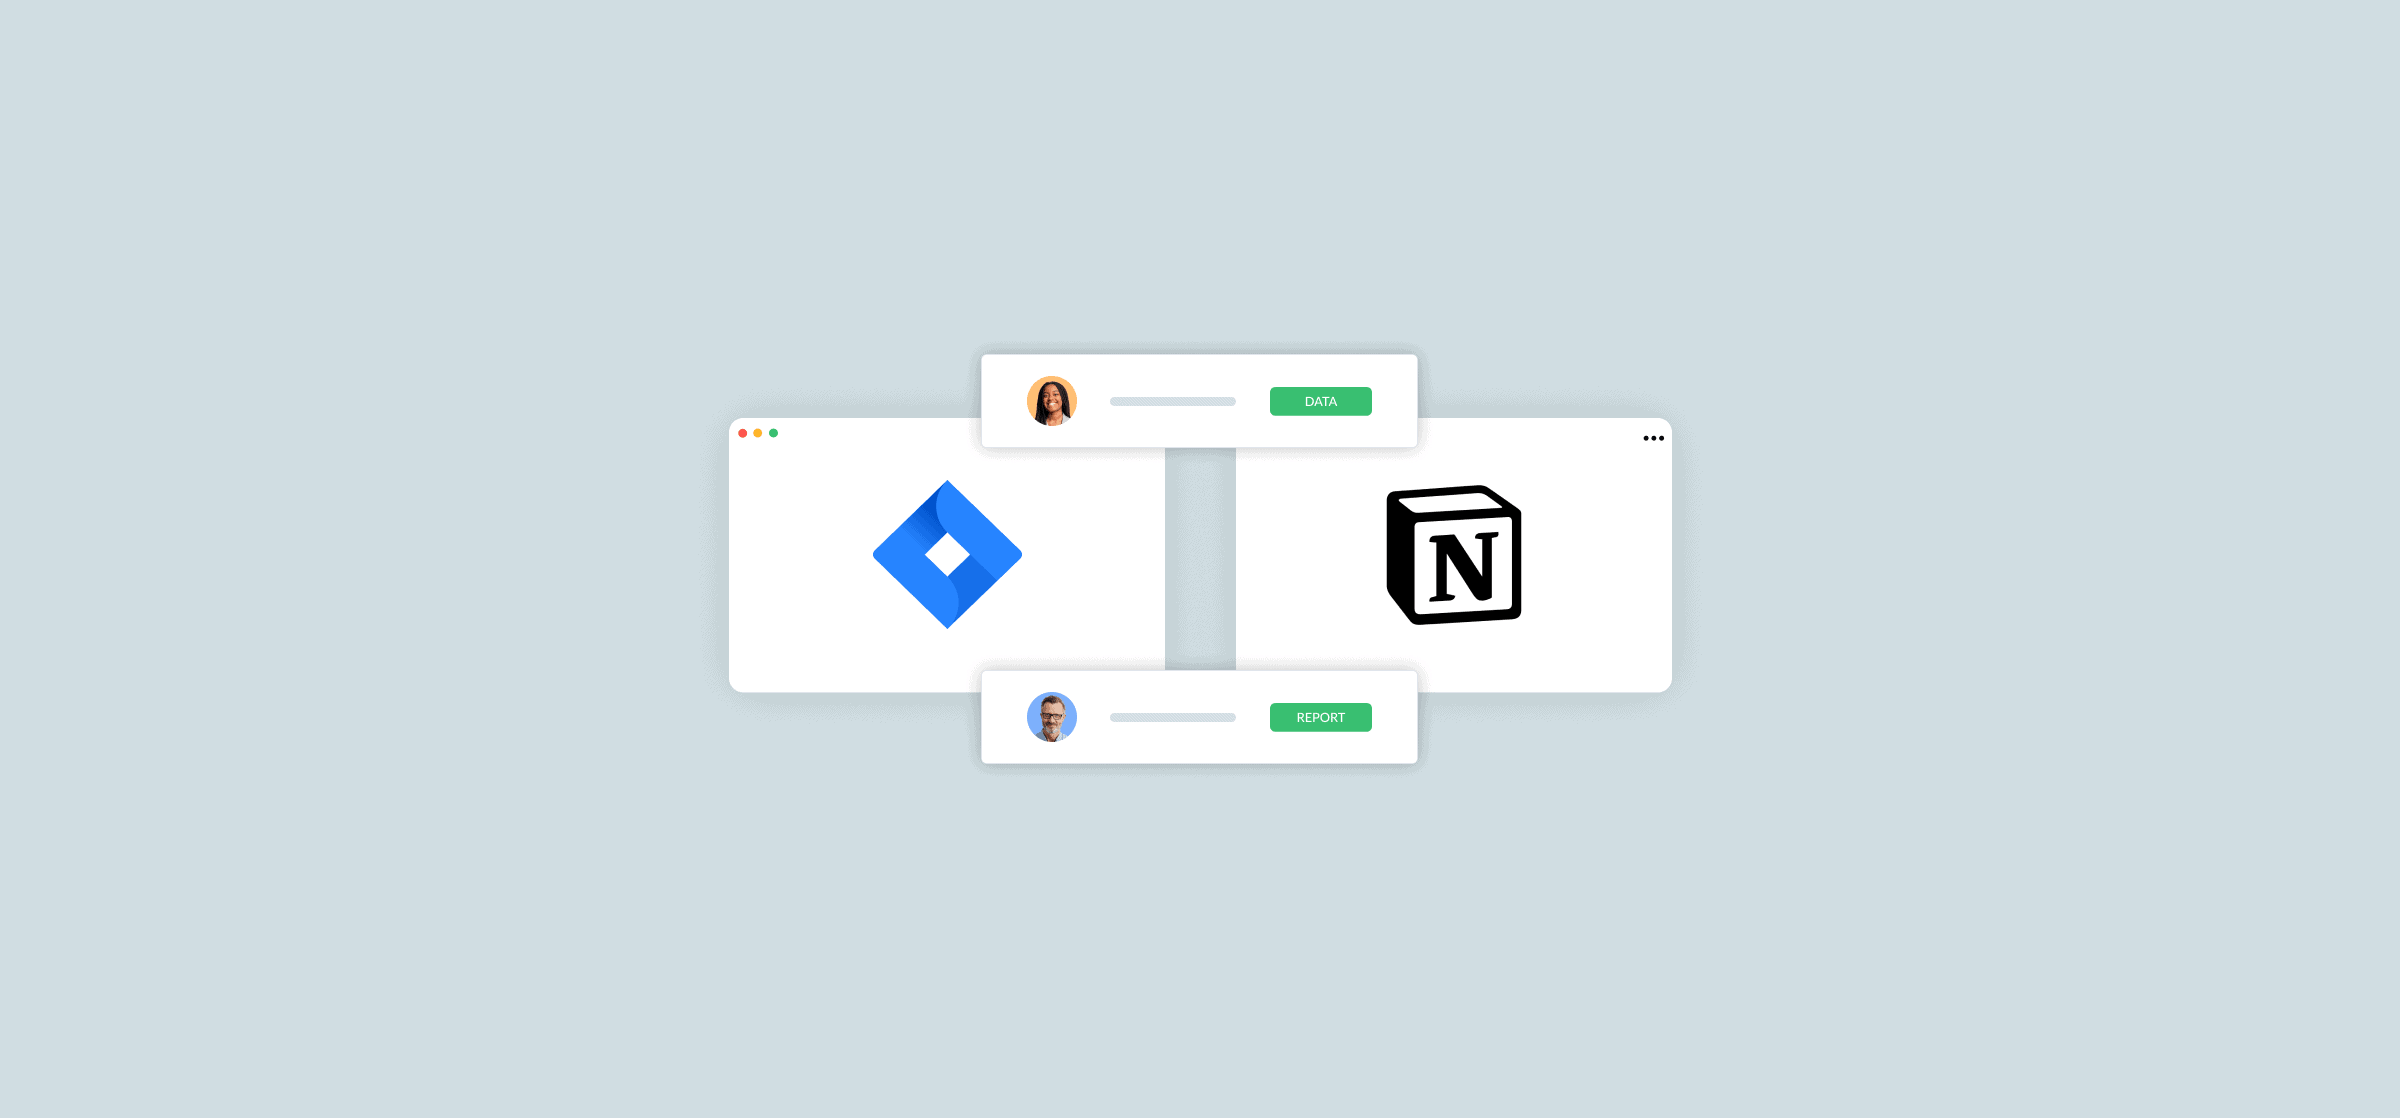
How to Sync Jira Projects to a Notion Database (2 Methods)
It’s a tale as old as time. Your software development teams and product managers love Jira…and no one else does. Anyone collaborating with your developers has to face the tough choice of learning to use Jira or constantly copying and pasting data to their own tool — like Notion. But who has the time for that? Not you. Thankfully, there’s more than one way to set up an integration from Jira into Notion.
One method is one Notion’s newest features, while the other depends on a little help from Unito. Here’s a guide to both.
First method: Set up a Jira → Notion integration with synced databases
With Notion’s connections, you can pair tools with your Notion pages to streamline work across teams. At their most basic, these connections can create individual, read-only replicas of work items from other tools, allowing you to keep an eye on their progress without leaving Notion. But synced databases — currently available for GitHub and Jira — take this to a whole other level.
Synced databases bring an entire Jira project into Notion in just a few clicks, meaning you can keep track of dozens of issues without any extra manual work. Here’s how it’s done.
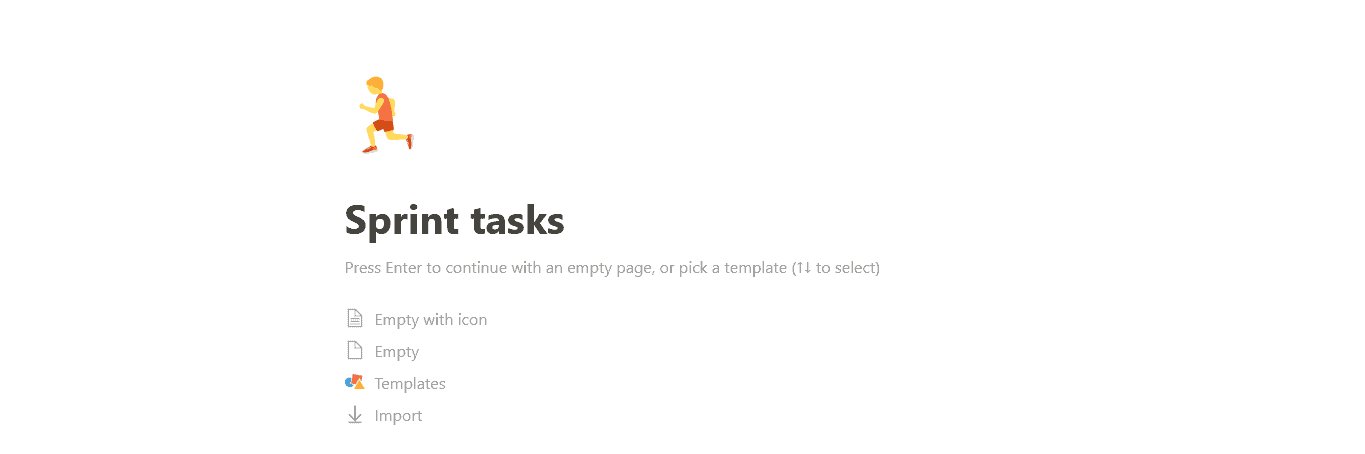
Start by creating a blank Notion page that’ll hold your synced database.
Next, you’ll need to authorize Jira in Notion. Go to the sidebar and click Settings & members.
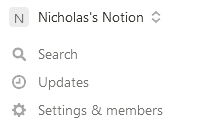
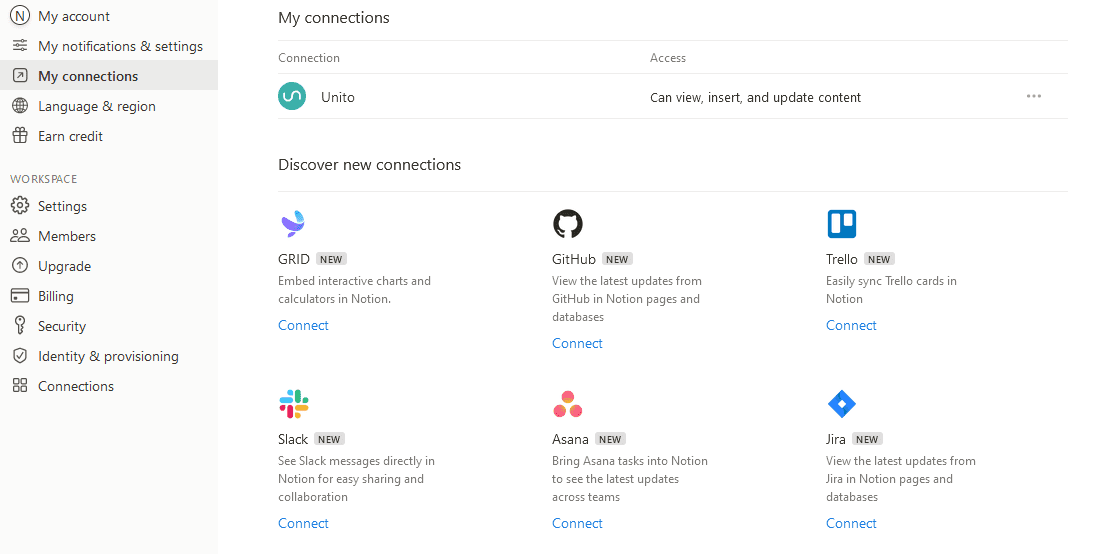
From there, go to My connections.

Find Jira and click Connect.
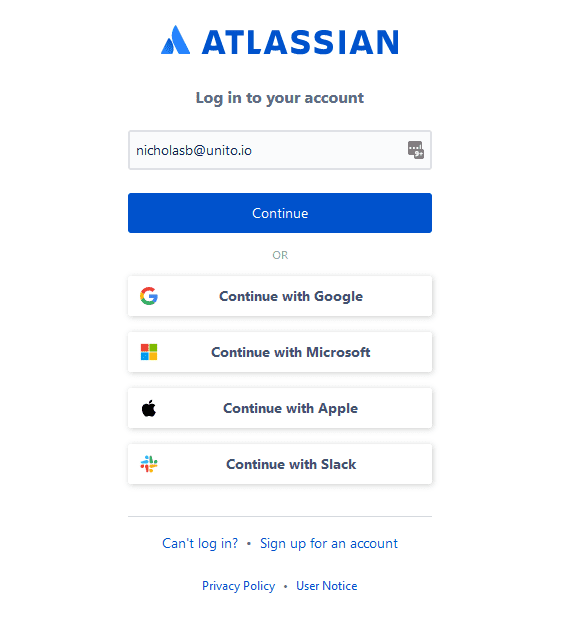
You’ll get this screen from Atlassian. Log in and authorize Jira.
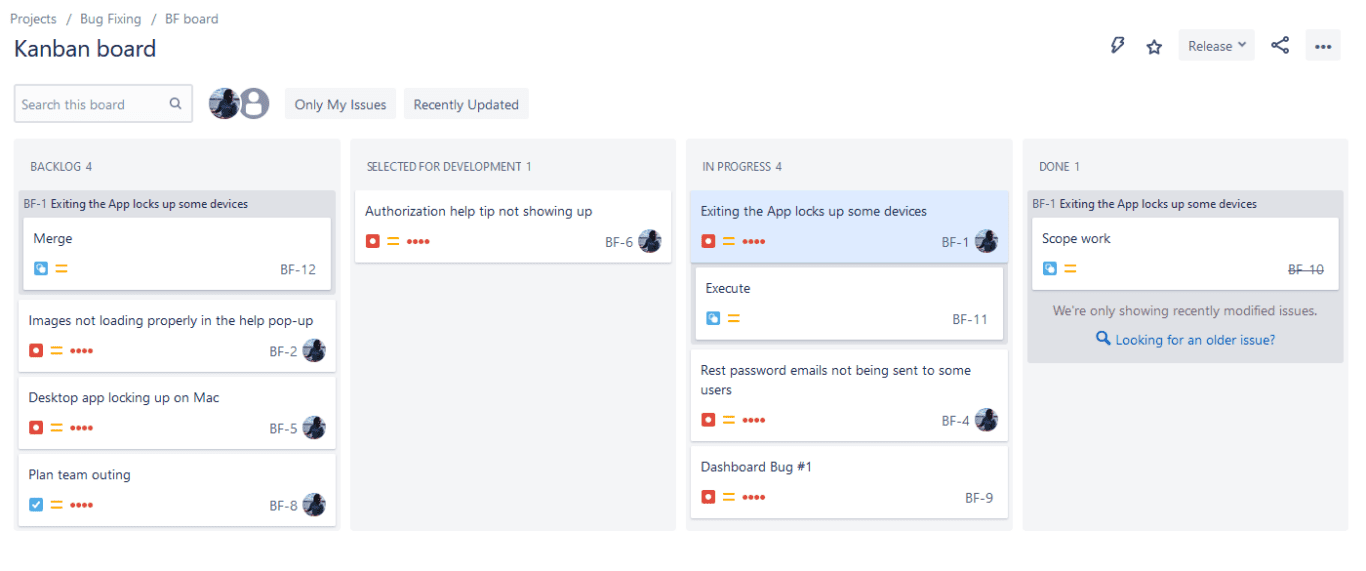
Now the magic’s about to happen. Go to your Jira project and copy its URL.
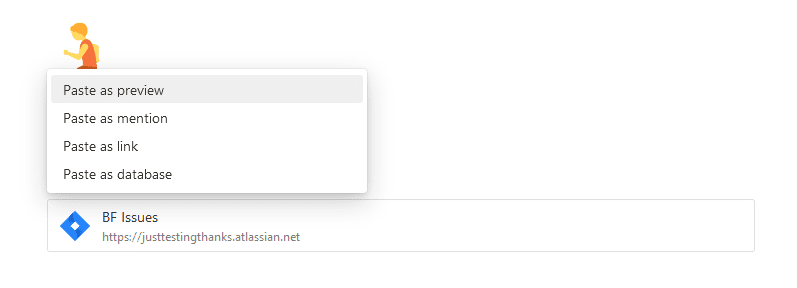
And paste it into your Notion page. You’ll get a pop-up menu here; make sure to click Paste as database.
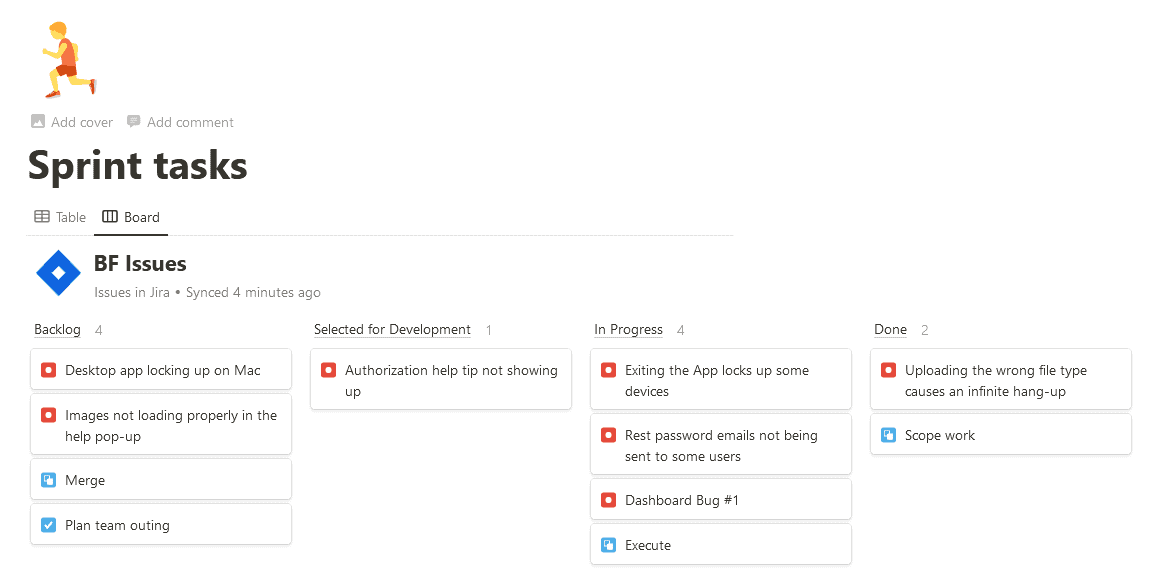
Just like that, you’ve created a synced database! Your Jira issues will automatically sync into Notion, and you can open up any of them just like on any other Notion page.
Limitations of this method
It’s pretty hard to beat “copy and paste a link” for ease of use and simplicity. If you’ve always wanted to see what was happening in a specific Jira project without actually opening it, Notion’s synced databases are just what you’ve been waiting for. That said, synced databases have a few limitations you should consider:
- They’re read-only: If you thought you’d be able to make changes to your Jira issues from Notion, think again. Treat your synced database as a window into your Jira projects, nothing more.
- They need a bit of cleanup: Since creating a synced database is done through essentially a single step — pasting a link — you might find yourself with some cleanup to do in Notion. For example, importing a Jira project for this blog post resulted in columns that were out of order and a ton of accidentally duplicated fields.
- They only work for a few tools: Synced databases are currently only available for Jira, GitHub, and Asana. That’s great if you’re collaborating with people in those tools, but otherwise you’re pretty limited.
So while creating a synced database only takes a few clicks, it’s not always the best solution. That’s fine if you just want a window into a Jira project — and can put up with a bit of manual cleanup — but that won’t work for everyone.
Luckily, there’s another way.
Second method: Sync Jira and Notion with Unito‘s integration
Unito is a no-code workflow management solution with the deepest two-way integrations for some of the most popular tools on the market, including tools like Notion, Jira, Trello, Google Sheets, and more. With a Unito flow, you can automatically sync Jira issues to a Notion database and edit data in both tools.
Here are a few reasons why Unito is the best way to sync Jira and Notion:
- It’s a true two-way sync: Want to make changes to a Jira issue from Notion? With a Unito flow, you can. Or you can make a read-only view. It’s up to you.
- There’s no cleanup required: When you build a Unito flow, you choose how to map fields, how many issues you want synced over, and what that’ll look like in Notion before everything gets synced over.
- It works with all your tools: Want to sync Jira issues with Asana tasks? Export Airtable bases to Notion (or vice-versa)? Send HubSpot tickets to Jira? With Unito’s full range of integrations, the sky’s the limit.
Why does this work? When you connect Jira projects and Notion databases with a Unito flow, your Jira issues will become pages in Notion, keeping everything in sync. And because this works in both directions, you don’t have to worry about either tool becoming outdated, and you can make changes on either end
“Our workflow is only possible because of Unito. I’ve looked at other similar services but it’s not possible anywhere else because of Unito’s integration for Notion and Airtable.”
Tom Nassr, CEO at XRay.Tech
Quick facts about Unito’s Jira to Notion integration
Wondering if Unito’s integration is the best fit for your workflow? Here are some quick facts to help you decide.
Unito has the deepest two-way integrations on the market
Automation solutions like Zapier and Tray.io have a ton of integrations but they’re best suited for one thing: pushing data. That means you can get away with using them if you just want to create new pages in Notion or Jira issues, but not if you want to sync any kind of data between them. You’d need a ton of individual automations to get something like that.
Not so with Unito. With a single Unito flow — which you can build in minutes — you can automatically create new work items in both tools and keep them up-to-date automatically.
Unito supports the fields you need
Some of the integration platforms you’ll find on the market lack depth: they only support a few fields in your tools. That means you won’t get all the data you need. With Unito, you’ll get an in-depth view of what’s going on in your tools.
- Supported fields in Jira: Affected version, Assignee, Attachment, Comment, Component, Description, Due Date, Epic, Fix Version, Issue ID, Issue Number, Issue Status, Issue Type, Label, Link to Issue, Original Time Estimate, Priority, Project Name, Remaining Estimated Duration, Reporter, Resolution, Sprint, Sprint End Date, Sprint Start Date, Subtask, Summary, Time Spent
- Supported fields in Notion: Title, Description, Created Date, Start and Due Date, Number, Single-Select, Multi-Select, Date, Assignee, URL, Email, Phone number, Checkbox, Creator, Relation.
Companies like yours trust Unito to sync their date
Unito is SOC 2 Type 2 certified and has strict security measures in place to protect your data. Unito’s team of engineers is constantly monitoring infrastructure to ward off threats, and an on-call engineer rotation means there’s always someone available to handle any issues. Here’s how companies like yours are using Unito’s Jira to Notion integration.
- E-commerce shipping facilitator Passport Shipping uses Unito to sync Jira issues to Notion and create a product roadmap that anyone in the company can consult.
- Topl, a blockchain-development company, trusts Unito to send data from GitHub issues into Jira so product managers and developers can collaborate more efficiently.
- Online sales platform builder Digistore24 syncs data from software development work in Jira to ClickUp, their project management tool of choice, using Unito.
- Global manufacturing leader Boveda Inc. uses Unito’s integrations to sync Wrike tasks to Jira and keep teams in sync.
How to set up Unito’s Notion Jira integration
Here’s how easy it is to sync Jira projects with Notion.
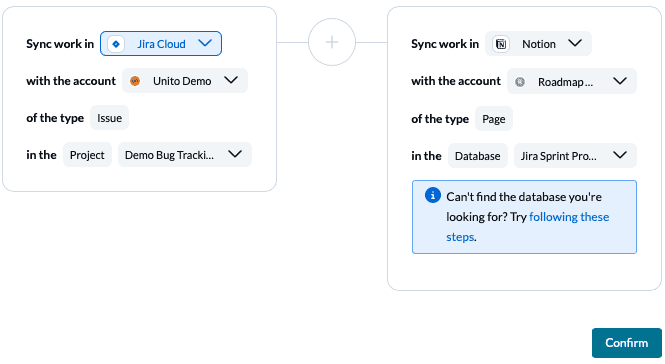
Connect your Jira and Notion accounts to Unito. Pick the Jira project and Notion database you need to sync.
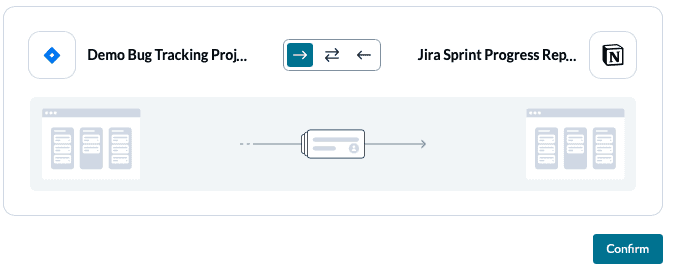
Pick a directional flow. This tells Unito where to create new Notion pages or Jira issues automatically based on your manual activity.
Want to sync everything or just a few work items? Use rules to filter out the Jira issues you don’t want synced.
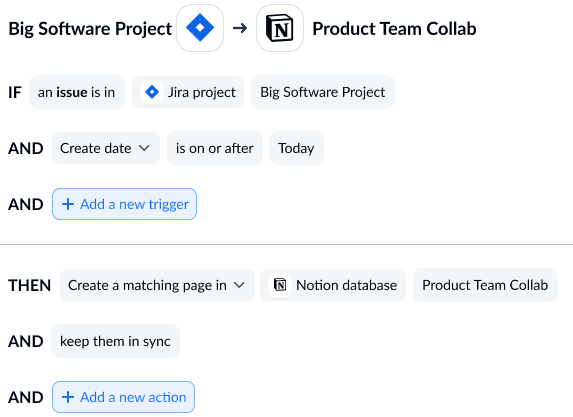
Next, map your fields together so all your data goes to the right place. Unito can usually map most of these automatically, but it’s a good idea to review them.

And that’s it! Now just launch your flow and watch as Jira issues are automatically synced to your Notion database through Unito’s integration.