

How to Automatically Export and Sync Wrike Tasks to Google Sheets with 2-Way Updates
There are countless reasons to export the details of your Wrike tasks into Google Sheets automatically. Perhaps you have to report on dozens (or hundreds) of different projects and folders, but don’t want to manually review each one. At a certain point, it just becomes an impossible chore to check so many, you have to find a way to consolidate updates into a single location.
That’s where Wrike Sync, powered by Unito can come in handy.
This guide will show you how to automatically populate a spreadsheet with specific fields from your tasks in Wrike. It can be used for reporting, manipulating data with the flexibility of a spreadsheet, sharing specific details on project progress with stakeholders, or as you’ll see in our demo: getting a quick overview of your team’s time off requests.
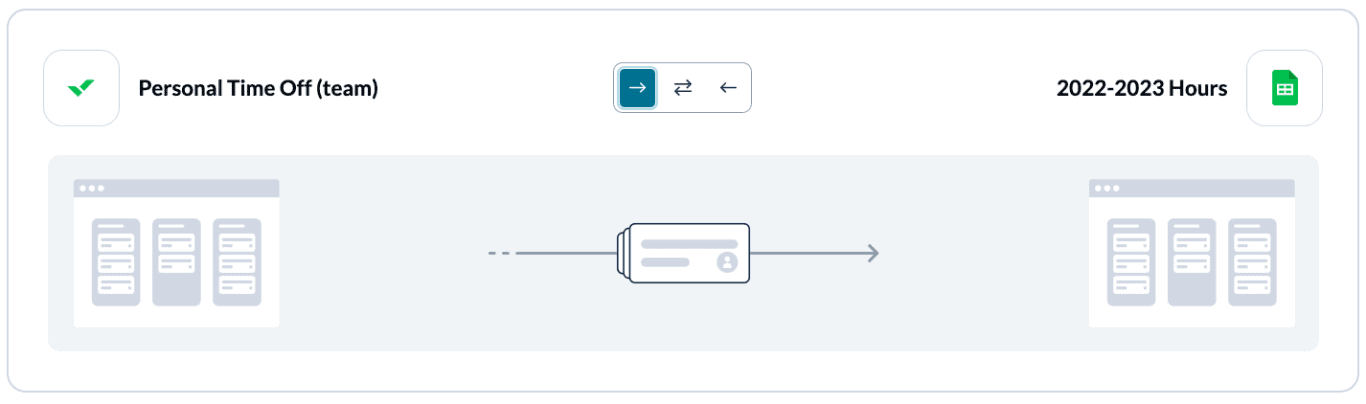
Here’s what our synced spreadsheet and Wrike project looks like:
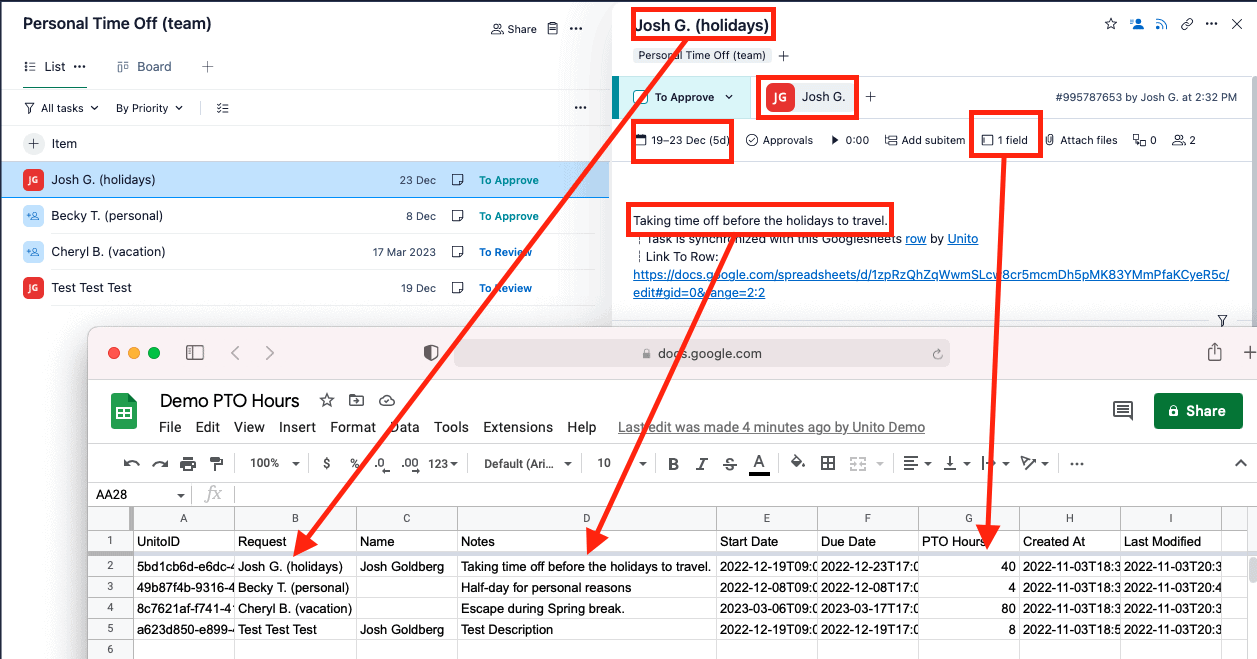
Put simply, your Google Sheets rows represent each Wrike task, while the columns represent the various fields (e.g., title, description, assignee, dates, etc.).
If you’re new to Unito, you can check out our integration overview for Wrike + Google Sheets before coming back to connect your tools.
Watch this Wrike Google Sheets integration in action
In this guide, you’ll learn how to:
- Set up a spreadsheet based on Wrike task information.
- Turn the fields (details) of Wrike tasks into rows in Google Sheets.
- Set up a two-way sync between your fields so that any changes in Wrike or your spreadsheet will automatically appear in the other.
Before we build a report in Google Sheets synced with Wrike:
- Install the Unito add-on for Google Sheets. This walkthrough will show you how, or you can follow that link.
- Keep in mind that Unito can only sync text and number fields from Wrike to your spreadsheet. Check out our integration overviews of Wrike and Google Sheets to review their capabilities and limitations.
The demo below is just one of many use cases for this Unito flow, which should help give you an idea of how 2-way automation can change the way you work for the better. We also have a similar guide for guide for Microsoft Excel users who want to power their reporting workflows with a 2-way, self-serve, automation.
Prepare your Google Sheet to sync data from Unito
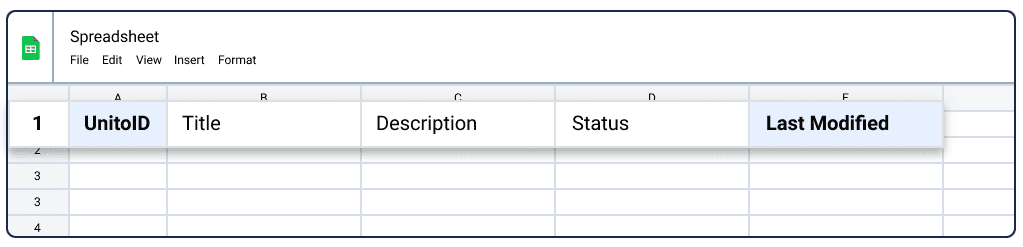
Create a header row in Google Sheets
Go to docs.google.com and open up your spreadsheet. Make sure each column in the first row is clearly labelled with whatever titles you want to map to or from Wrike. If you don’t know how to categorize the data you want synced, you can start with this Google Sheets template.
Note: Make sure your columns are where you want them to be once your tasks begin syncing to Google Sheets. If you try to move columns around afterwards, you may encounter errors.
Install Unito Spreadsheet Sync from the Google Workspace Marketplace
From the Google Workspace Marketplace you can install Unito Spreadsheet Sync, which is required in order to sync your spreadsheets.
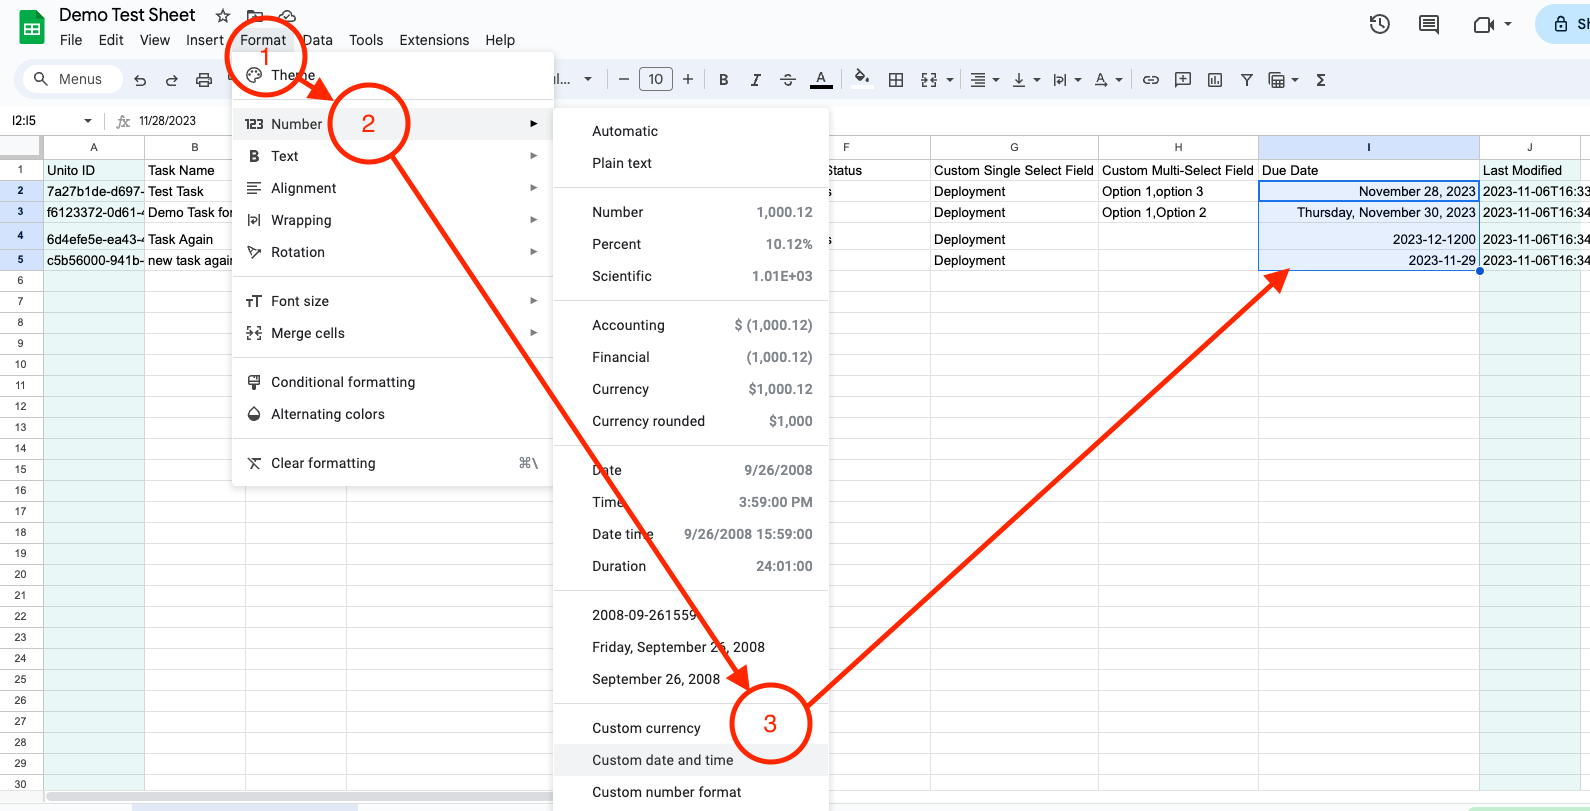
Choose a date and time format for your spreadsheet
you can adjust the date-time format in your spreadsheet to any format you wish.
- Open your sheet and select the column with your dates.
- Then click Format > Number > Custom date and time.
- From there you can choose the format you wish and apply it to all the cells in your date columns.
Step 1: Connect Wrike and Google Sheets to Unito
- Now you can either go to the Unito App and click +Create Flow or continue from your Wrike workspace once you’ve added and authorized the WrikeSync add-on.
- Click Start Here to connect your tools.
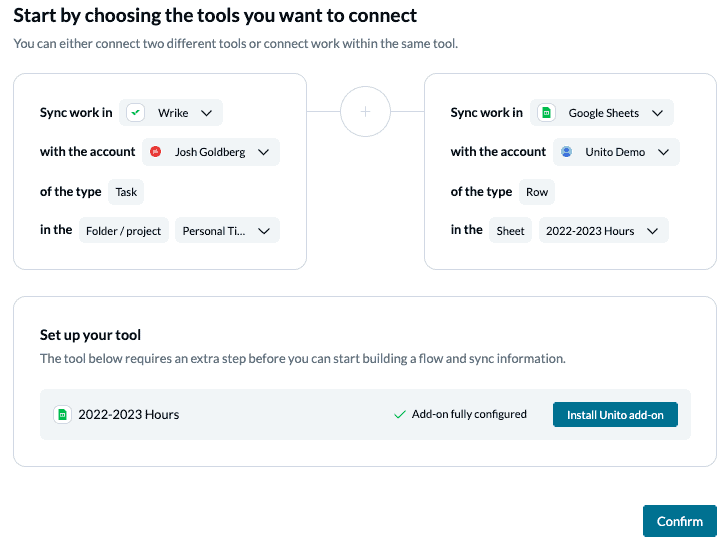
- Select +Add a tool to this flow in either column and connect Wrike. Then click +Choose account to specify the Wrike account you want to use.
- Pick the Wrike project you want to connect to Unito.
- Repeat steps 3 and 4 to connect Google Sheets with Unito.
- Click Confirm.
Step 2: Set a flow direction between Wrike and Google Sheets
Flow direction determines how new tasks or rows are created by Unito. So with a two-way sync at this stage, adding new rows to Google Sheets will create a matching item in Wrike, and vice versa. Since we’re building a report in a spreadsheet, we’ll choose a one-way sync from Wrike to Google Sheets.
Note: Later, you’ll be able to add field mappings to determine which fields will be kept updated in both tools — regardless of the flow direction you set here.
Select Confirm when you’ve chosen a flow direction.
Step 3: Set rules to filter data between Wrike and Google Sheets
This is where you can set up conditions to filter out Wrike tasks that you don’t want to appear in Google Sheets. If you don’t set any rules, then all items in your chosen Wrike folder will appear in Google Sheets. If that’s what you want, simply hit confirm and proceed.
Otherwise, Add a new trigger to begin setting up your rules. There can be some variability here, depending on your particular setup.
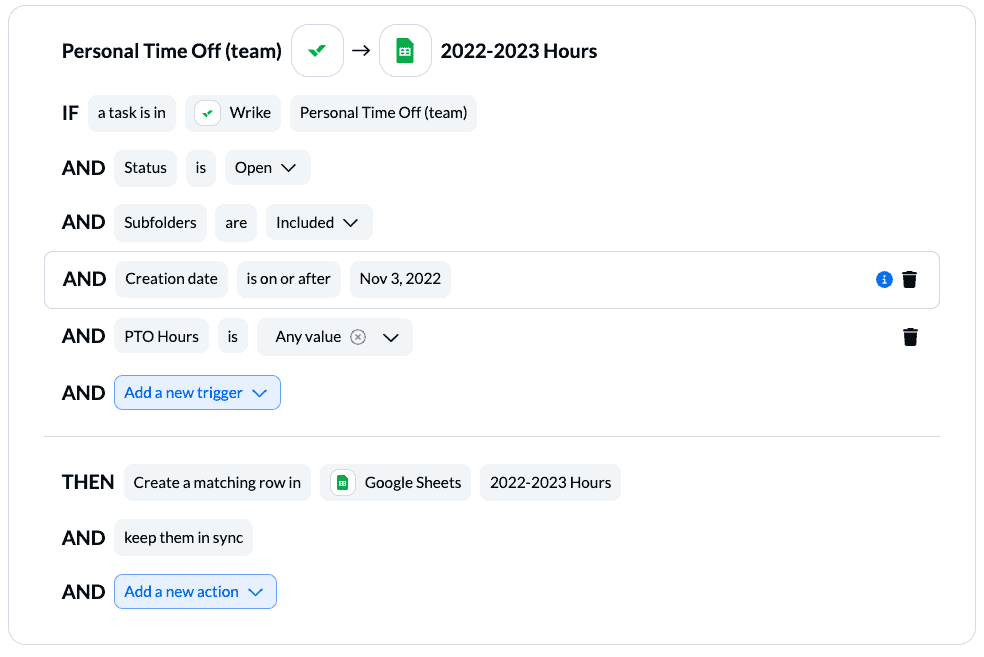
Rules can filter data using several fields in Wrike though we recommend choosing status or priority.
You can learn more about setting up rules here.
Step 4: Customize field mappings to sync rows between Wrike and Google Sheets
Fields represent the details of your spreadsheet rows and Wrike tasks. Since you’re sending field data to a spreadsheet, you’ll only be able to sync numbers or text fields.
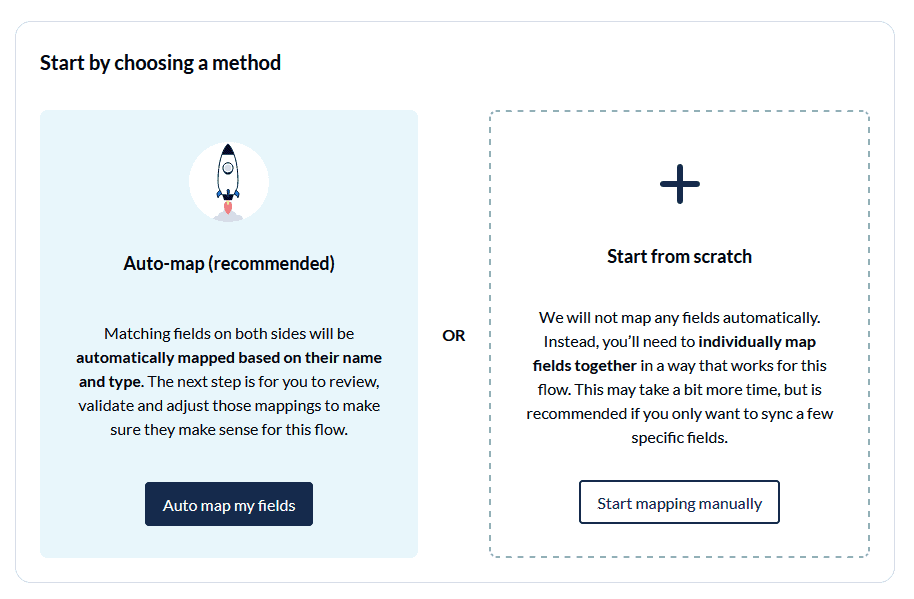
Before you can dive in, you have to tell Unito whether or not to try auto-mapping fields. This feature works best when fields have the same name in both tools so that Unito can easily recognize them. Since we’re working in a spreadsheet though, you’ll have to select start mapping manually.
On the next screen, select +Add mapping, then Select a field in both bases to pair the fields together. Here’s a simplified version of our Wrike to Google Sheets field mappings

And here’s what this set of field mappings will look like after syncing with Unito:

Note: If you change a column name in a synced spreadsheet, be sure to update your flow’s field mappings in Unito or else your data will stop syncing.
Click Confirm when you’re satisfied with your field mappings.
Note regarding workflow status
You can’t sync workflow statuses from more than one custom workflow at a time.
So be sure all the tasks in your synced project or folder include statuses from either the default workflow or the same custom workflow in Wrike.
Here’s how to see (and modify) which workflow your project or folder is using in Wrike:
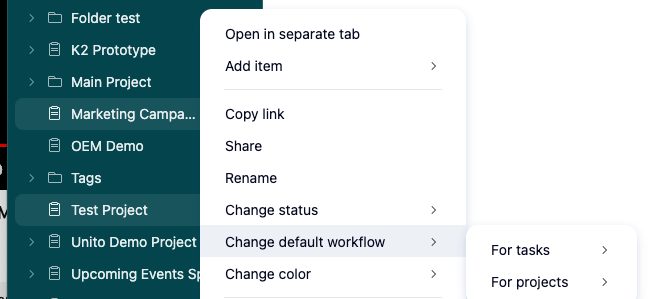
From the left-hand menu, click the more icon: …
Then, Change default workflow > For tasks and choose the workflow you have in mind for the synced project or folder.
Step 5: Save, close, and launch your workflow!
And that’s it! You’ve just built a flow between Wrike and Google Sheets. Congratulations!
If you followed the steps above, your flow will now:
- Automatically create new Google Sheets rows based on specific Wrike tasks.
- Keep your spreadsheet and project/folder updated in real-time.
If you have any questions, please don’t hesitate to reach out and let us know.
What’s next after setting up your Wrike-Google Sheets integration?
If you want to know what else you can do with Unito, here’s some inspiration to help you power up your workflows:
- Connect Wrike with Jira to collaborate across project management tools
- Learn more about Wrike Sync
- Read our troubleshooting guide for Google Sheets
- Duplicate this flow to sync other Wrike projects to Google Sheets.
- Connect Wrike with Jira or Trello to collaborate across project management tools
- Send Wrike task details to Airtable and back
- Collaborate on customer tickets in Zendesk from your Wrike interface.
- Send Miro cards to Wrike to save time copy-pasting your favourite ideas from a brainstorm.
- Set up a CRM integration by syncing Wrike tasks with Salesforce.
Best practices and troubleshooting for Unito’s Google Sheets integration
Common error messages
If you see either of the error messages below, it likely indicates that one or both of the columns: “UnitoID” and “Last Modified” have been deleted or modified from your sheet. You’ll need to re-insert them (either manually or with the add-on) before your data will sync again.
“We’ve detected that mandatory columns have been removed from your Google Sheet. Let’s get you back up and running.”
“The container configuration does not allow us to sync.”
Why sync Wrike to Google Sheets with Unito?
Wrike is a superb project management tool for any industry or role, but sometimes you just need facts or figures in a comprehensive spreadsheet. Perhaps your boss doesn’t use Wrike, maybe you want to share a few figures with another team, or you just prefer the classic look and feel of Google Sheets.
Simplify reporting from Wrike to a spreadsheet
Drafting reports with an automation platform saves time and cuts down the risk of human error. Unito essentially takes care of all that copy-pasting for you so that you can focus more on high-skill tasks and less on redundant data entry.
Eliminate tedious copy-pasting from your day-to-day
If you only have a few projects or folders so far, it may not seem like a major task. But if that’s the case, you probably aren’t reading this article. You likely have dozens if not hundreds of projects and associated tasks and have recognized how much of a chore it is to review them all manually. At a certain point, you just can’t copy-paste every single task into your spreadsheet manually as the time drags on and minutes stretch into hours.
So you have two choices: copy paste all the key details from your Wrike folders to a spreadsheet, or connect them to an automation platform with two-way sync, such as Unito.
Getting around with Google Sheets and Unito
You can find more information on the following topics in Unito’s knowledge base: