

How to Export and Sync ClickUp Tasks Into Google Sheets Automatically with 2-Way Updates
This guide will show you how to quickly set up a no-code 2-way integration with Unito that continually exports ClickUp tasks into Google Sheets and keeps both updated in real-time.
ClickUp is an superb project management tool with a range of useful features to enhance collaboration among your teams and departments. However, when it comes to reporting and building dashboards, there’s no replacement for the simplicity and flexibility of a spreadsheet.
Google Sheets enables users to quickly generate reports and organize data in a way that’s visually appealing and easy to scan. Unfortunately, although some of us may try, Google Sheets cannot manage projects or tasks in the same way ClickUp does. But luckily, you don’t have to choose!
Unito seamlessly integrates ClickUp with Google Sheets through a simple, no-code 2-way integration that allows you to easily export tasks to your spreadsheet for simplified reporting.
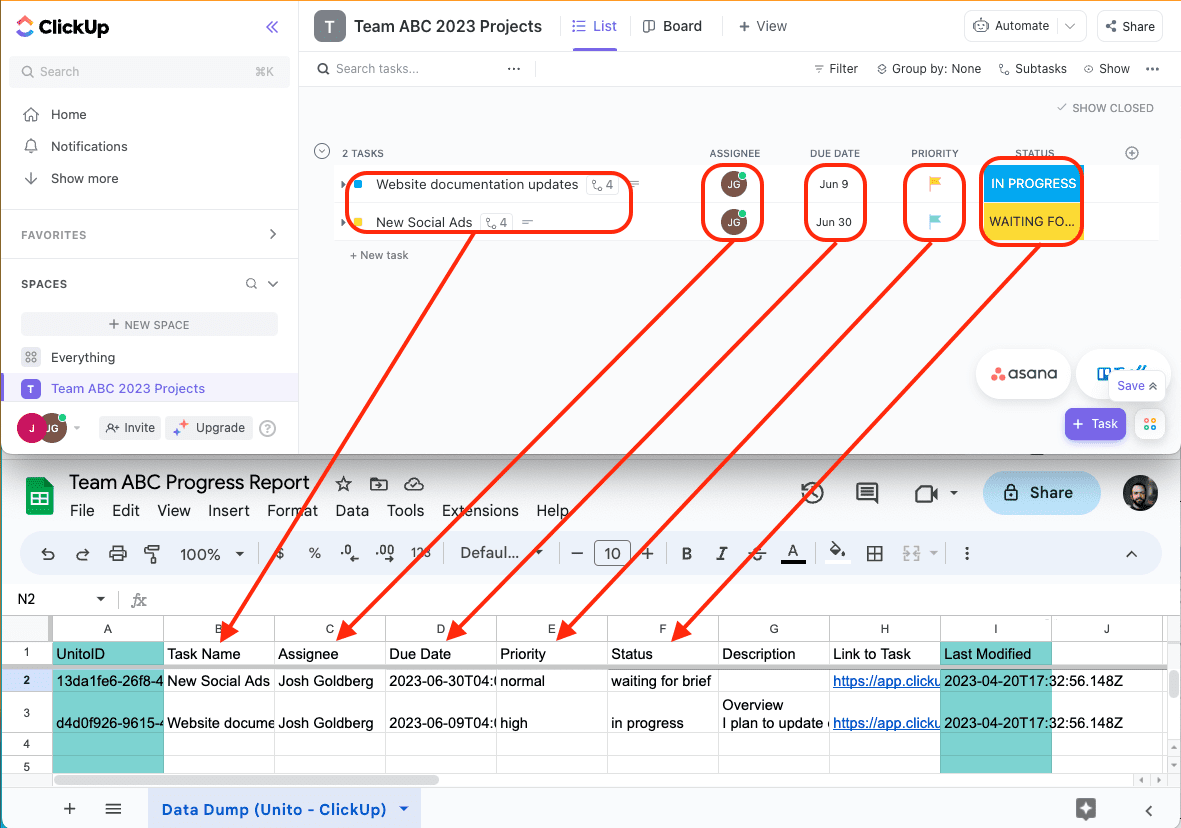
Here’s what our synced ClickUp tasks look like in Google Sheets:
By the end of this walkthrough, we’ll show you how anyone on your team can set up a 2-way Unito flow that exports ClickUp tasks into Google Sheets with automated 2-way updates.
Before we export ClickUp tasks to Google Sheets:
- Install the Unito add-on for Google Sheets.
- Review our integration overviews of ClickUp and Google Sheets to understand their capabilities and limitations. For example, Unito can sync tasks, but not subtasks to a spreadsheet.
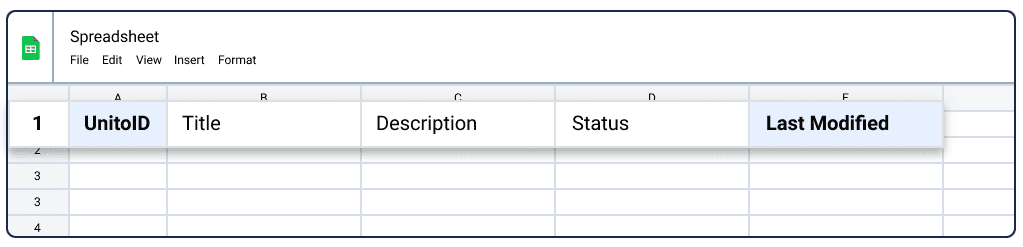
Create a header row in Google Sheets
Go to docs.google.com and open up your spreadsheet. Make sure each column in the first row is clearly labelled with names that match fields you’ll be mapping over from ClickUp. After all, your rows will represent tasks, so your columns need to represent fields. If you don’t know how to categorize the data you want synced or want some inspiration, you can start with this Google Sheets template.
Note: Make sure your columns are where you want them to be once your tasks begin syncing to Google Sheets. If you try to move columns around afterwards, you may encounter errors.
Install Unito Spreadsheet Sync from the Google Workspace Marketplace
From the Google Workspace Marketplace you can install Unito Spreadsheet Sync, which is required in order to sync your spreadsheets.
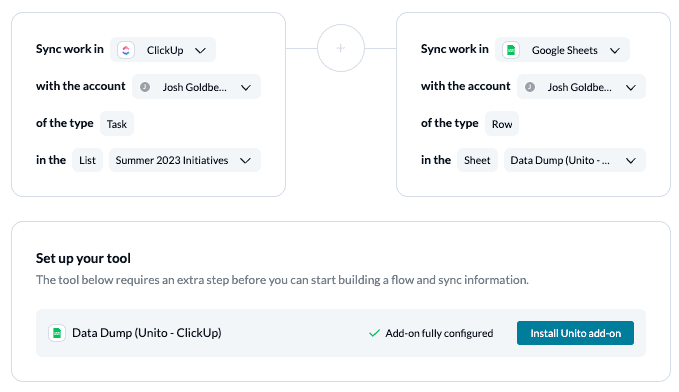
Step 1: Connect ClickUp and Google Sheets to Unito
- Now you can go to the Unito App and click +Create Flow.
- Click Start Here to connect your tools.
- Select +Add a tool to this flow in either column and connect ClickUp. Then click +Choose account to specify the ClickUp account you want to use.
- Pick the ClickUp list you want to connect to Unito.
- Repeat steps 3 and 4 to connect Google Sheets with Unito.
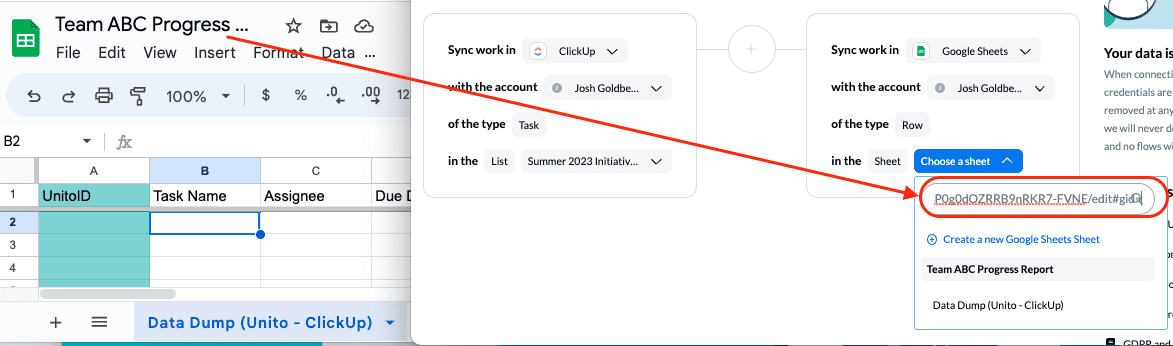
If you can’t find the spreadsheet you’re trying to connect, simply copy-paste the URL into the search bar within the Choose a sheet drop-down menu:
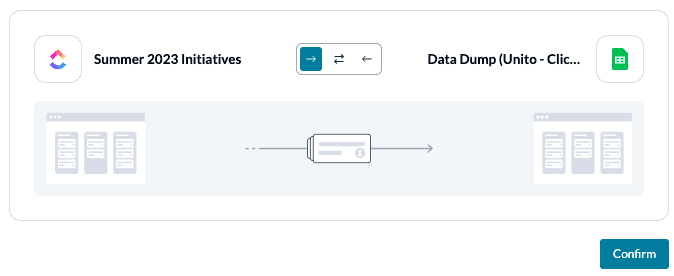
Click Confirm when you’re ready to proceed.
Step 2: Set a flow direction between ClickUp and Google Sheets
Flow direction determines how new tasks or rows are created by Unito. So with a two-way sync at this stage, adding new rows to Google Sheets would create a matching task in ClickUp, and vice versa. Since we’re building a report in a spreadsheet, we’ll choose a one-way sync from ClickUp to Google Sheets:
Note: Later, you’ll be able to add field mappings to determine which fields will be kept updated in both tools — regardless of the flow direction you set here.
Select Confirm when you’ve chosen a flow direction.
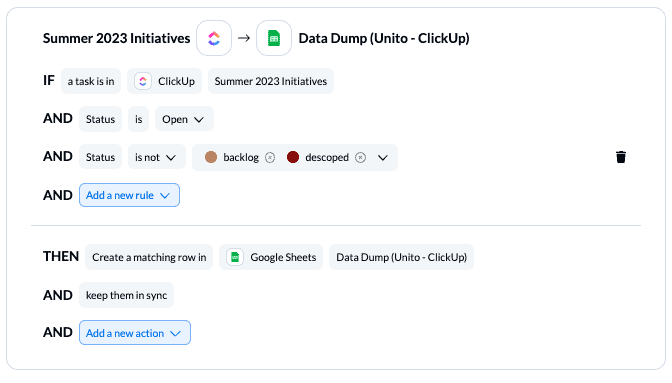
Step 3: Set rules to include or exclude specific ClickUp tasks from exporting to Google Sheets
This is where you can set rules in Unito (conditions or triggers) that filter out ClickUp tasks from exporting to Google Sheets. This can be useful if you’re building reports based on the work of specific assignees, or have tasks for multiple projects in the same list, or another use case that would be easier to review with fewer tasks synced.
If you don’t change the default rules, then Unito will only sync tasks that are created after you launch this flow. That’s a safeguard to let you test out the export before syncing historical work items. You can remove it by simply clicking the bin icon:
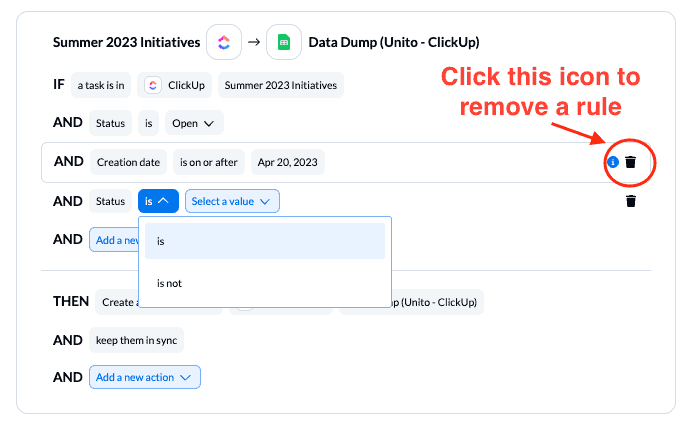
You can learn more about setting up rules here.
Step 4: Select ClickUp task fields to export into Google Sheets
Fields represent the details of your spreadsheet rows and ClickUp tasks, e.g., title, description, assignee, etc. Since you’re exporting task data to a spreadsheet, they will only appear as numbers or text fields.
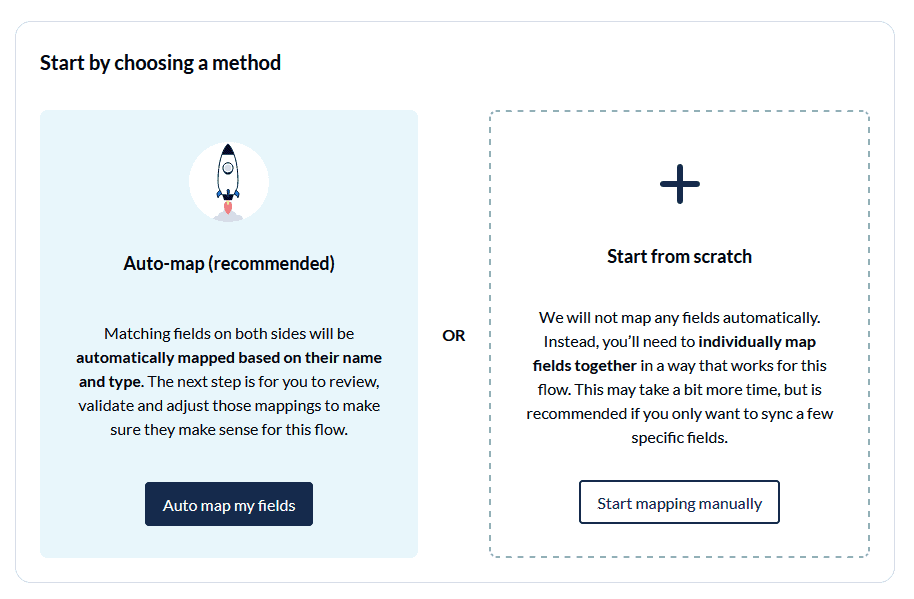
Before we can begin mapping fields however, we need to choose between manual field mappings and auto-mapping. Unito’s auto-mapping feature works best when fields have identical names. Since we’re working in a spreadsheet with custom names for each column, you’ll have to select start mapping manually.
On the next screen, select +Add mapping, then Select a field in ClickUp and Google Sheets to pair your fields together. Here’s our demo version of field mappings between ClickUp and Google Sheets:
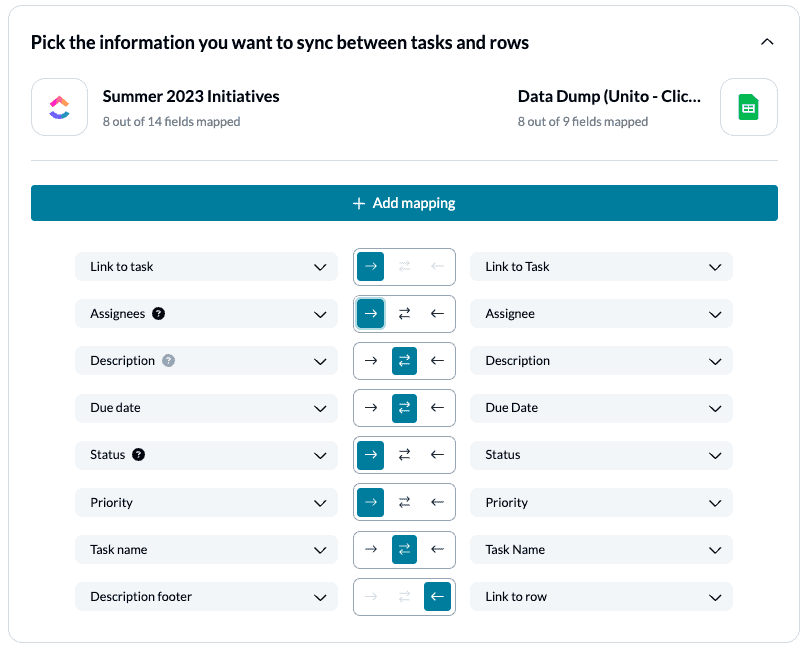
The directional arrows between each mapping indicate where fields can be modified and still sync to the other tool. Edits made in the source field will sync to the destination, but not vice versa.
In our demo example, changing the status or priority in ClickUp will see that change reflected in Google Sheets. But editing a status field in our spreadsheet won’t change anything in ClickUp.
Click Confirm when you’re satisfied with your field mappings.
Note: If you change a column name in a synced spreadsheet, be sure to update your flow’s field mappings in Unito or else your data will stop syncing.
Step 5: Save, close, and launch your workflow!
And that’s it! You’ve just built a flow between ClickUp and Google Sheets. Congratulations!
If you followed the steps above, your flow will now:
- Automatically create new Google Sheets rows based on specific ClickUp tasks.
- Keep your spreadsheet and list updated in real-time.
If you have any questions, please don’t hesitate to reach out and let us know.
Why export ClickUp tasks to Google Sheets with Unito?
This workflow will help you save time by eliminating manual input and the risk of human error. Unito’s automated platform gives your teams the opportunity to, instead, focus on high-level tasks instead of mundane data entry.
ClickUp works for just about any industry or role. However, there are times when you need more than just a task list: You need facts and figures that can be formatted nicely in a spreadsheet. Maybe your manager, or key stakeholders don’t use ClickUp, or maybe you need to share key information with another team without inviting them into your ClickUp workspace. Either way, rather than spending countless hours manually transferring data from ClickUp to Google Sheets, you can connect them via Unito’s two-way sync feature.
What’s next after setting up your ClickUp-Google Sheets integration?
- Find more resources for your Google Sheets integrations here.
- Duplicate this flow to sync other ClickUp lists to Google Sheets.
- Here’s how to Sync ClickUp to Google Calendar.
- Do you love Unito? Refer a friend or contact and get a reward!