

How to Sync ClickUp Tasks to Google Calendar with Automated 2-Way Updates
Here’s how to stay on top of every ClickUp task with a key date or deadline that needs to be tracked by syncing them to a personal or shared Google Calendar. This 2-way integration between ClickUp and Google Calendar offers a streamlined way to view any project timeline without having to shuffle through your ClickUp notifications for important dates.
Anyone on your team will instead be able to review key dates related to tasks directly in your Google Calendar, minimizing distractions from other projects in ClickUp.
This article will show you how anyone on your team can set up a simple integration between ClickUp and Google Calendar that syncs tasks to events in no time.
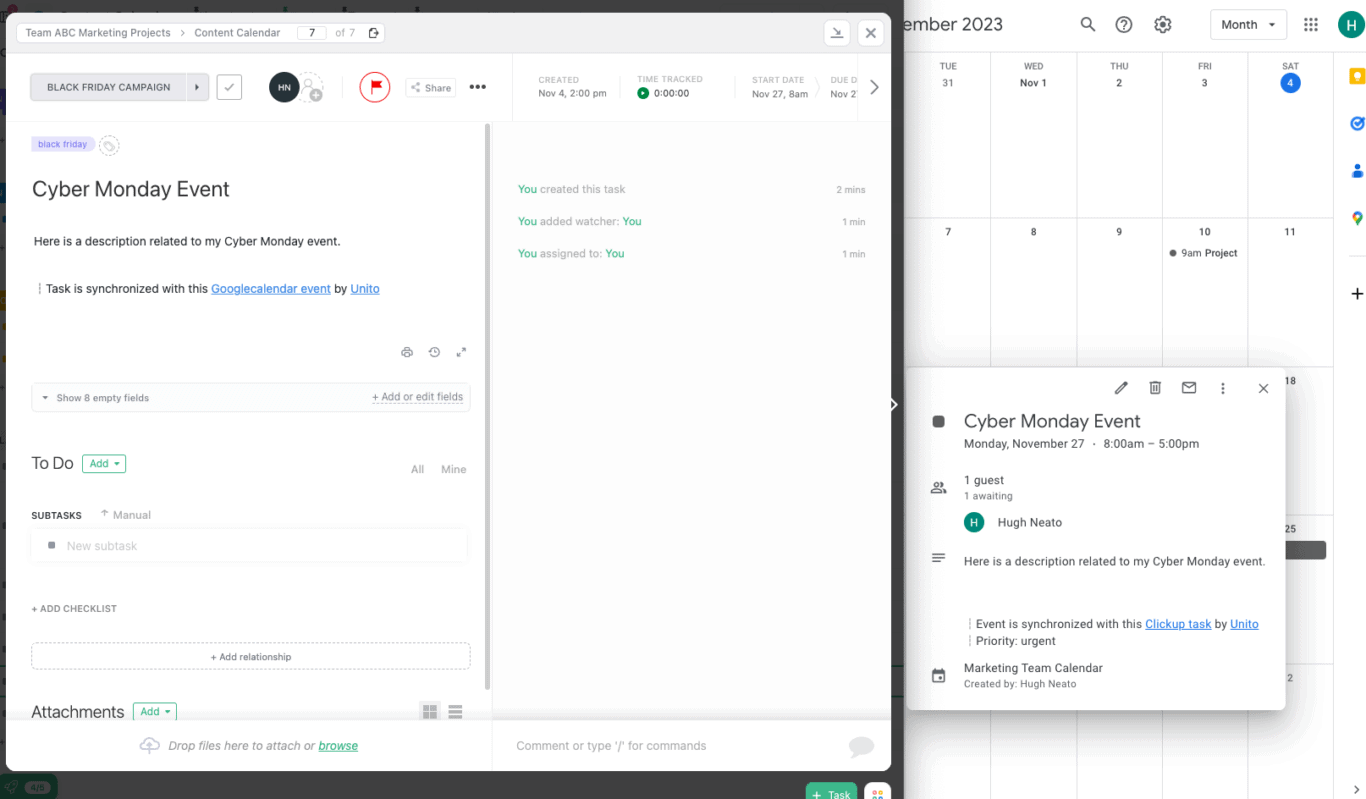
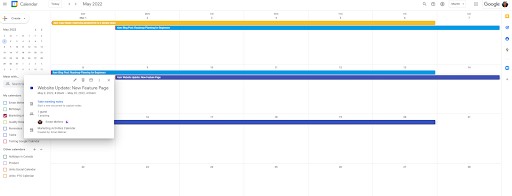
Here’s a look at our completed integration between ClickUp and Google Calendar:
This ClickUp Google Calendar integration has two goals:
- Create a 1-way sync from ClickUp to Google Calendar with rules to create events in the latter based on tasks in the former.
- Set up a 2-way sync for relevant fields to will allow changes made in Google Calendar to appear in the related ClickUp tasks.
Why sync ClickUp tasks to Google Calendar?
The main reason to set up this workflow is to track important deadlines without having to go through your tasks or projects. Instead you can quickly review them from your Google Calendar, which is much easier to check, say, when you’re on-the-go and just want to quickly glance at your phone to see which dates you need to remember and why.
Managing marketing calendars from ClickUp
From managing critical deadlines for marketing initiatives, campaign launches, or event planning, the integrated Google Calendar serves as your marketing team’s central hub for all important dates and tasks. So even if you don’t have access to ClickUp that day, week, or month you can still see what’s coming up from your synced Google Calendar.
Simplified project management
Perhaps you’re a project manager who wants to schedule tasks in ClickUp for each stage of a project, while tracking them from a Google Calendar. You can choose exactly which tasks to sync, and how much information you want to see about each one from your calendar. This can even be expanded to support a project reporting initiative by linking tasks to your calendar and both to Google Sheets.
The goal is to always offer a clear, distraction-free visual timeline for everyone.
Keep sales teams updated on significant deal-related tasks
In the same vein, sales professionals can synchronize their client follow-ups and meetings from ClickUp to their Google Calendar, ensuring no client interaction is overlooked. Similarly, content creators can organize their content calendar in ClickUp and have it mirrored in Google Calendar for easier planning and management.
Here’s our demo use case for syncing ClickUp to Google Calendar
Let’s imagine there’s a marketing team using ClickUp to manage projects and coordinate work related to key campaigns and events. In this case, we’re anticipating a number of major Black Friday initiatives. To keep everyone in the loop on important dates and deadlines, the team is going to sync ClickUp task dates to a shared Google Calendar.
It can be used to let employees know when to share content on their own platforms, to let sales reps see when new collateral will be available, and so on. Connecting ClickUp with Google Calendar will enable them to sync tasks and lists from ClickUp including: assignees, details, dates, times, etc.
Watch this ClickUp Google Calendar integration in action:
Before syncing ClickUp with Google Calendar
- Feel free to review our integration overviews for ClickUp and Google Calendar. Make sure you have accounts in each with the right permissions to access and modify information.
- You may wish to create a new shared calendar if you don’t want to sync an existing calendar.
- NOTE: Unito identifies contacts and calendar guests by their email address. In order to sync guests to your shared calendar, each email address must be associated with your contacts in ClickUp and Google Calendar before building a flow.
Step 1. Connect ClickUp and Google Calendar to Unito
Navigate to the Unito App and select +Create Flow. On the next screen, select Start Here to connect ClickUp and Google Calendar. Choose the accounts you want connected to Unito. When you connect Google Calendar for the first time, make sure to select every checkbox in order for your flow to function properly.
You’ll need to specify which account, list, and Calendar you wish to sync through Unito.

When you’re ready, click Confirm.
Step 2. Set a 1-way flow direction from ClickUp to Google Calendar
Your data can sync either from one tool to the other, or bidirectionally. At this stage, we are only determining which tool will create a new event or task in the other. Since our goal is to enhance visibility in Google Calendar on upcoming content, we’ll set a 1-way flow from ClickUp to Google Calendar.

Click Confirm when you’ve chosen a flow direction.
Step 3. Pick rules to sync specific events to Google Calendar from ClickUp
Next, we’ll set up rules that determine which trigger events will send data between ClickUp and Google Calendar. This is our chance to filter out tasks we don’t want to appear as events in Google Calendar. A great way to do so is by making use of status, labels, or tags in ClickUp, and/or colors in Google Calendar.
Select Add a new trigger to sync your relevant status with Google Calendar.

In the above example, our demo will create matching events in Google Calendar for tasks labeled with the status: “Black Friday”. This way, the only tasks that will appear in our calendar as events are those that relate to the upcoming campaign.
Find out more about setting rules.
Step 4. Set field mappings between ClickUp and Google Calendar
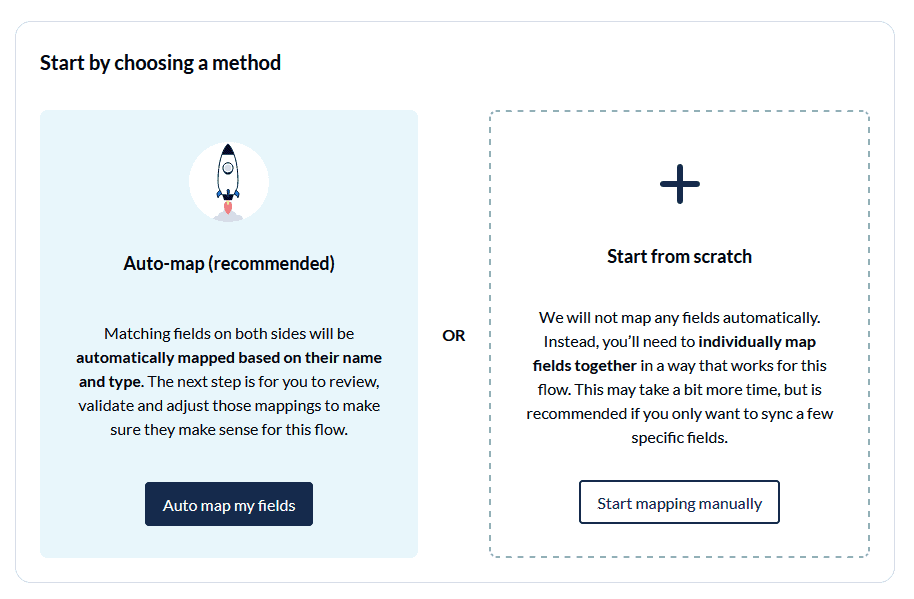
While rules are intended to set triggers for when and how data should be synced, choosing fields determines which details from your tasks or calendar events will be synced. If you select auto-map, you can still change any mappings you want or add custom fields.
What are Field Mappings?
Click + Add mapping to sync additional fields, then Select a field for each tool and find the field you wish to map.

In the above example, we can see all the fields Unito auto-mapped between these tools.
- The most important fields to keep in mind are: Start Date and Time, and End Date and Time. Any task you sync to a Google Calendar event must include dates and times. If you don’t want to include start dates for your tasks, remove that pair of fields from your Unito flow.
- Be sure to add a time to every synced task, or else Unito will automatically assign a 3:00am time to your dates in Google Calendar by default.
- If there’s no start time, you may see dates appear with a one-hour block for your due date and time as well.
In the example below, we’ve mapped the status of our tasks to colors in Google Calendar so they will be easier to identify. Most of our fields have been synced bidirectionally so that changes in other Clickup or Google Calendar will appear in the other.
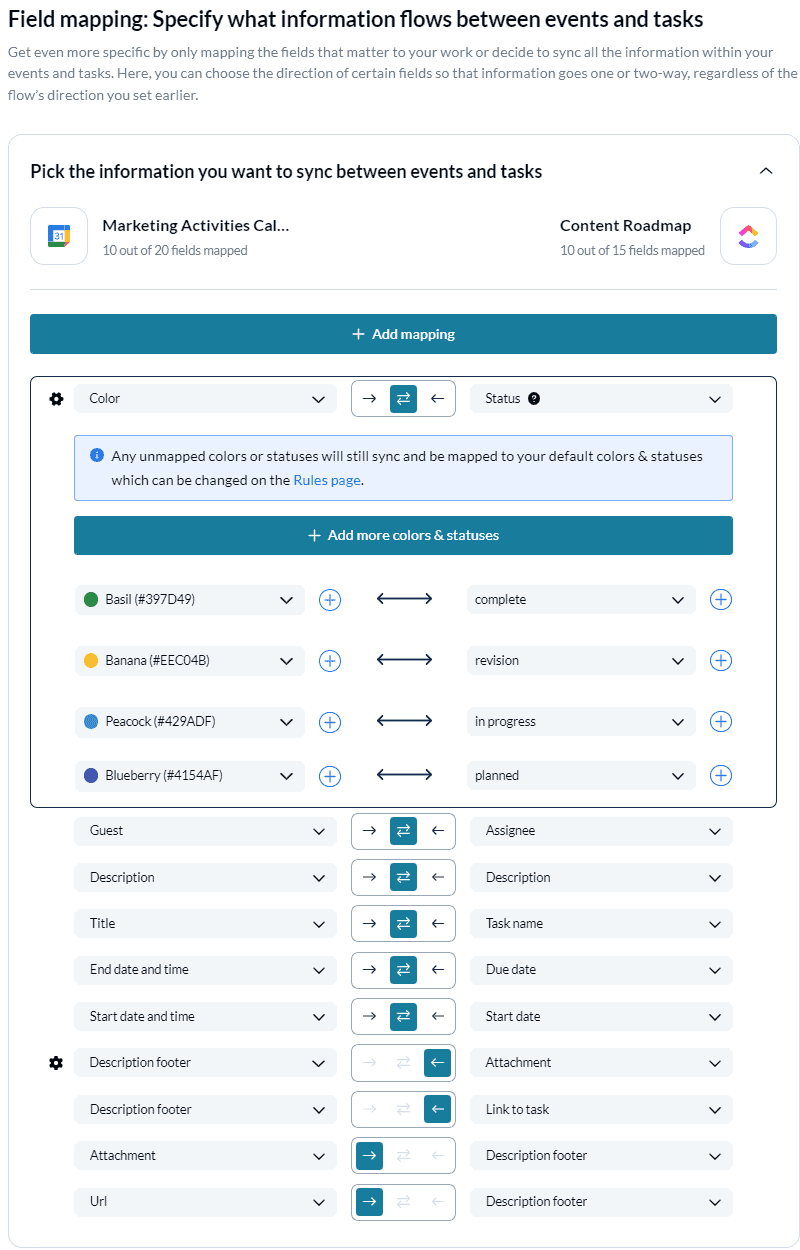
However, the Clickup fields Attachment and Link to task are set to a 1-way sync with our description footer in Google Calender. That means if we change the description footer in our calendar, Clickup will be unaffected, but if we add or remove an attachment from Clickup then that change will occur in the calendar.
Select the gear icon and then + Add more Status & colors to add a new mapping. Select a value to specify the status and color you wish to pair.
If you select the + sign beside a value, you can map a value in one tool to multiple fields in the other (e.g., digital could appear as both blue and yellow events in Google Calendar).
Click Confirm when you’re satisfied with your field mappings to proceed.
Find out more about setting field mappings.
Step 5. Save, close, and launch your ClickUp to Google Calendar flow
And that’s it! You’ve just completed a flow between ClickUp and Google Calendar. Congratulations!
If you’ve followed the steps above, your flow will now:
- Create an event in Google Calendar for every ClickUp task you’ve included in the rule set.
- Sync dates, times, guests, event titles, attachments and descriptions between your tools and keep them up to date in real-time.
If you have any questions, don’t hesitate to reach out and let us know. Our live support team is ready to jump in and lend a hand to make sure your flows always functions as intended.
What’s next after syncing ClickUp and Google Calendar?
- Learn how to duplicate this flow to suit other use cases you may have in mind.
- Learn how to export ClickUp tasks to Google Sheets.