
How to Sync ClickUp to Jira With Automated 2-Way Updates
In this walkthrough, we'll show you how you can quickly and easily turn ClickUp tasks into Jira issues (or tasks) with real-time 2-way updates whenever changes occur. This simple ClickUp Jira integration takes only a few minutes to set up and can be performed by anyone on your team, no coding knowledge required.
We’ll start by walking you through the process of connecting your tools together, sharing a few example use cases, then dive into the steps required. By the end of this article, you’ll have a clear, integrated workflow that automatically:
- Creates new ClickUp tasks based on your activity in Jira
- Creates new Jira issues or tasks based on your activity in ClickUp
- Automatically updates your synced Jira and ClickUp data in each direction whenever manual changes occur.
Here’s a closer look at this ClickUp Jira integration


Why sync ClickUp to Jira with an integration platform?
While both ClickUp and Jira offer users their own native integration for these tools, there are plenty of reasons why adding an iPaaS or 2-way sync platform, such as Unito, to your stack can simplify your day to day. The biggest differentiator is the power of real-time 2-way updates. No native integration can keep your Jira tasks or issues in sync with your ClickUp tasks in real-time. While it is possible to simulate 2-way sync with a series of complex automations and other platforms, only Unito was built to achieve this quickly and easily for users of all backgrounds and experience.
Setup in minutes, not months
This straightforward ClickUp-Jira integration takes just a few minutes to set up and can be performed by anyone on your team, no coding knowledge required.
So you can skip all the hassles of a traditional automation platform, including:
- Months of planning
- Lengthy implementation sessions
- The (costly) support of professional services teams.
Unito supports integrations between ClickUp and a variety of Jira products
Note: Unito supports integrations for Jira Work Management, Software Cloud, Data Center, and Service Management. If you’re new to Unito you can check out our ClickUp + Jira integration overview before coming back here to connect your tools.
Watch Unito’s Jira ClickUp integration in action
Before you connect Jira and ClickUp to Unito
Whether you’re syncing data from Jira Work Management, Software Cloud, Data Center or Service Management, you’ll need to configure Jira for Unito access. The Jira account connected to Unito must also have administrator access with global permissions.
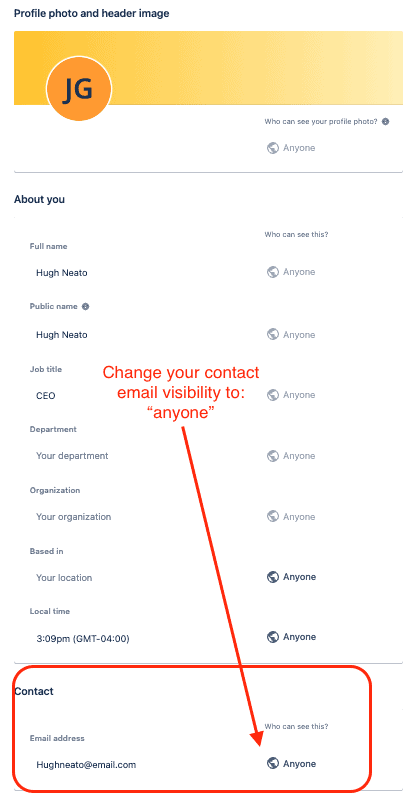
First, set your Jira contact email visibility to anyone from your Jira profile page.
Set up an application link in Jira
- Log in to Jira through Atlassian.com.
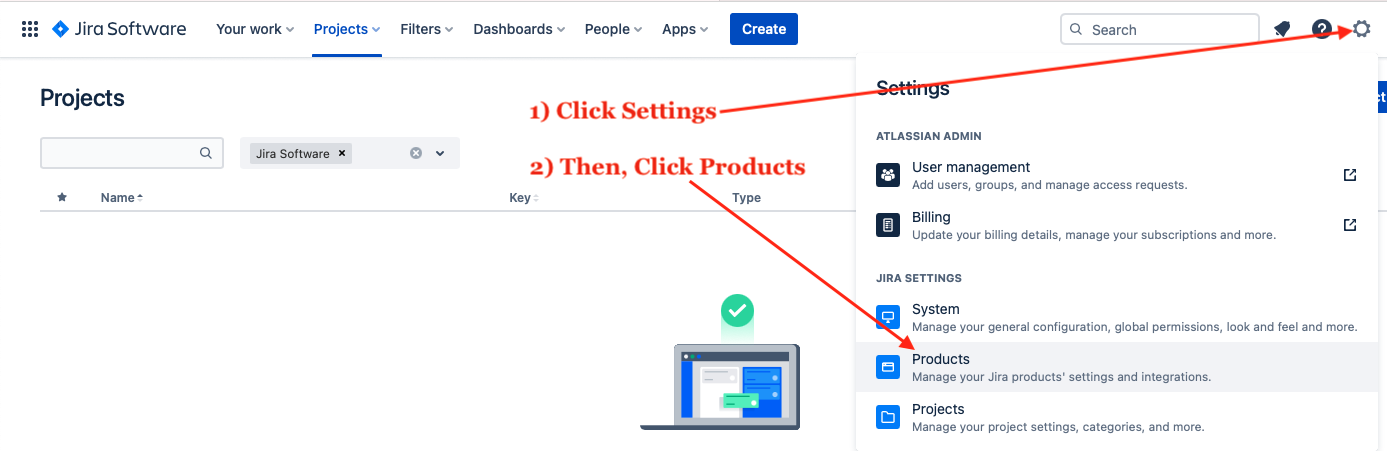
- Click Settings, then select Products.
- On the next screen, click Application links.
4. Enter https://app.unito.io in the Application field and click Create new link.
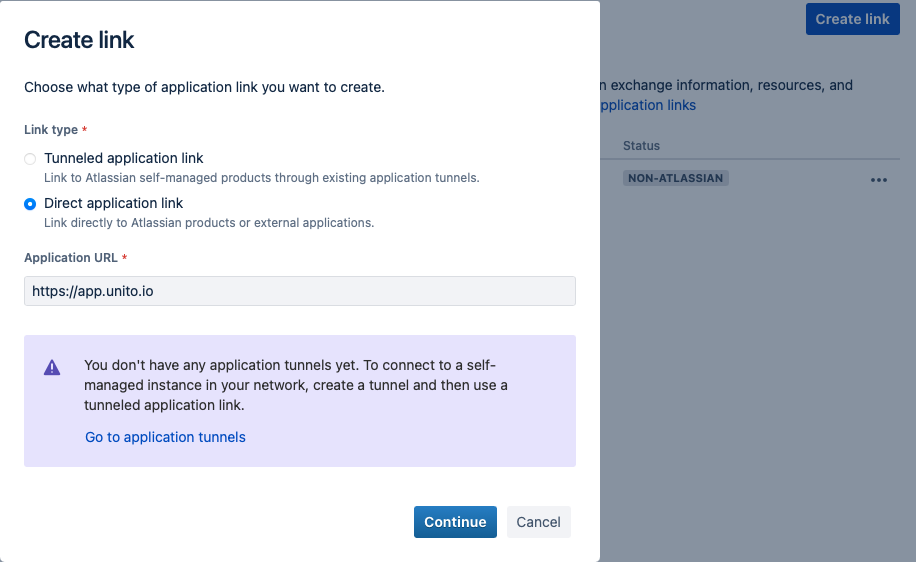
5. In the “Link Applications” modal window, complete these fields and leave the others blank.
- Application Name: Unito
- Application Type: Generic Application
- Create incoming link: checked
6. In the second form, complete these fields.
- Consumer Key: unito (all lower case)
- Consumer Name: Unito
- Public Key: copy paste the text below
—–BEGIN PUBLIC KEY—–
MIGfMA0GCSqGSIb3DQEBAQUAA4GNADCBiQKBgQDKYFuFsWD7ShJeazewedP2jUZt
ueK30giaA2QSGfhkryQHdwK0YGVGCgJ42muX/Aw53wdpl7g+7Xq8aO/xV7JjO5RG
e3VSBzKUak0/PhHYrg2Cvrj3hws833f3cXSlntMnT7Y/PGfQYyOUmzNBIha1IRrQ
CHeNnq2VbC6N9SL55wIDAQAB
—–END PUBLIC KEY—–
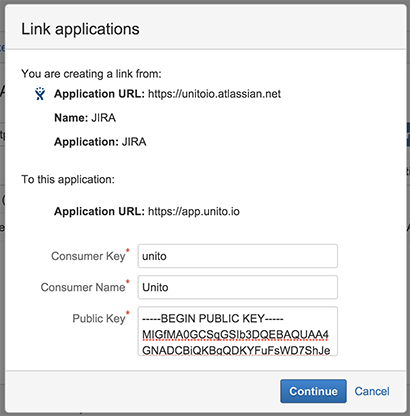
Click Continue.
Connect Jira and ClickUp to Unito
- Log in to the Unito App and click +Create Flow.
- Then, click Start Here to connect your tools.
- Select +Add a tool to this flow in either column, and connect your apps. Now, +Choose account to specify the account you want to use.
- From the next drop-down menu, type in the name of the folder or table you want to connect.
- Repeat steps 3 and 4 to connect your other tool with Unito.
- Click Confirm.

Pick a direction for new ClickUp tasks or Jira issues
Flow direction determines how new work items (e.g., issues or tasks) are created by Unito. That means you can decide whether new Jira issues should create ClickUp tasks, vice versa, or both simultaneously!

Select Confirm when you’ve chosen a flow direction.
Set rules to filter data between Jira and ClickUp
Your rules determine which tasks or issues sync with Unito. If you chose a two-way flow, you’ll have to set rules for both directions.
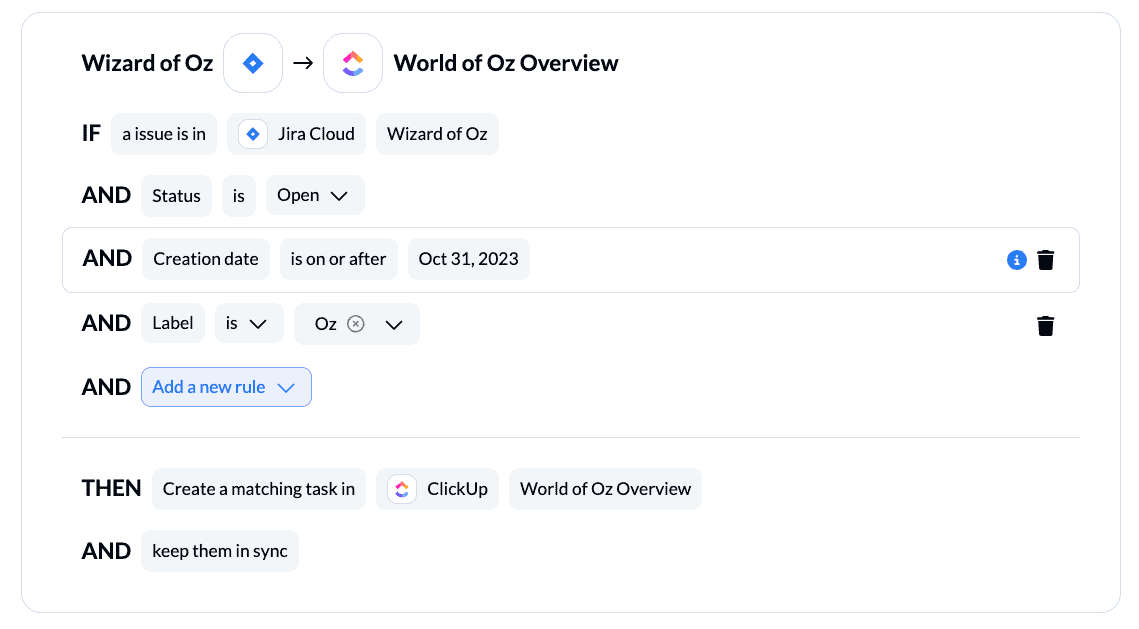
Select Add a new trigger to begin setting up your rules. There can be some variability here, depending on your particular setup in each tool.
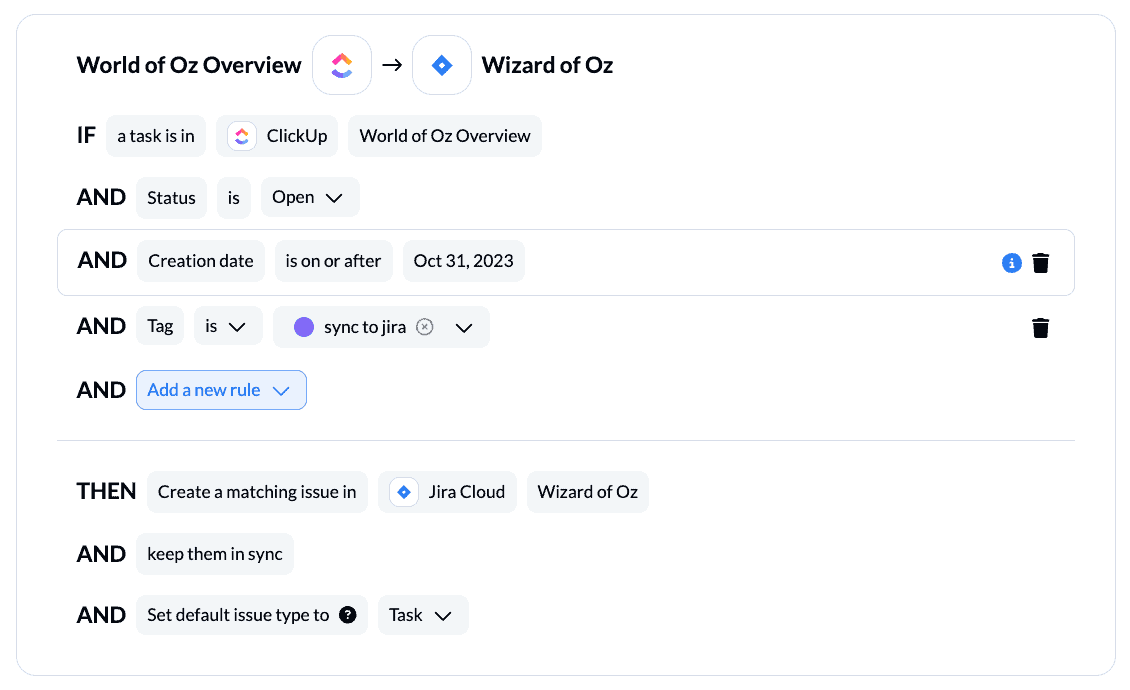
In the above examples, we’re syncing tasks and issues based on tags/labels in each tool. Here are some examples for context:
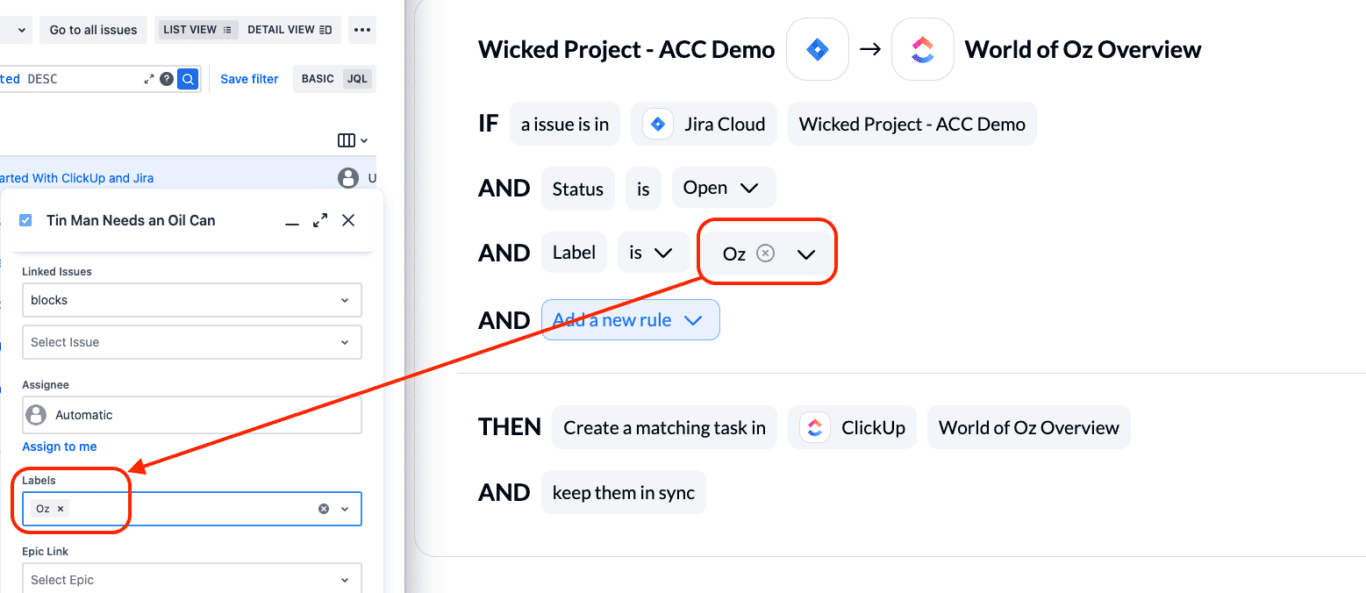
We recommend setting rules by label or tag, but feel free to explore Unito when you’re comfortable creating flows to see what works best for you.
You can learn more about setting up rules here.
Choose which fields to sync between ClickUp and Jira
Unito turns the details of your tasks or issues into mappable fields that can be synced between tools. These can be any task or issue detail: assignee, summary, attachment, description, etc. Even your custom fields can sync with Unito!
First, you’ll be asked whether you want to set up your field mappings from scratch or let Unito do this automatically.
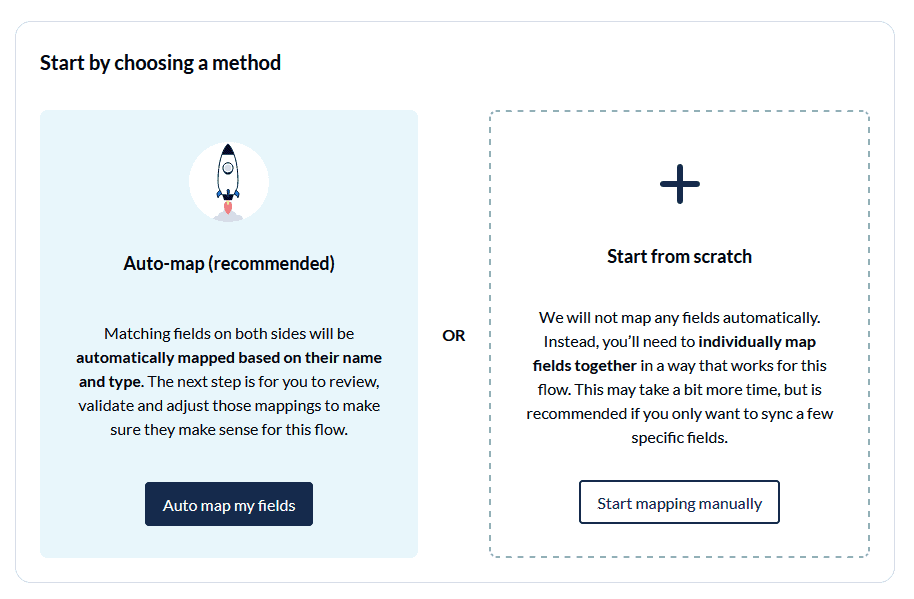
Most fields will automatically be mapped for two-way updates, but you can modify them individually if you prefer one-way updates in some cases. With two-way updates, changes made in either tool will automatically update the other. A one-way update restricts changes to a single direction.
Here’s a look at our auto-mapped fields between ClickUp and Jira:
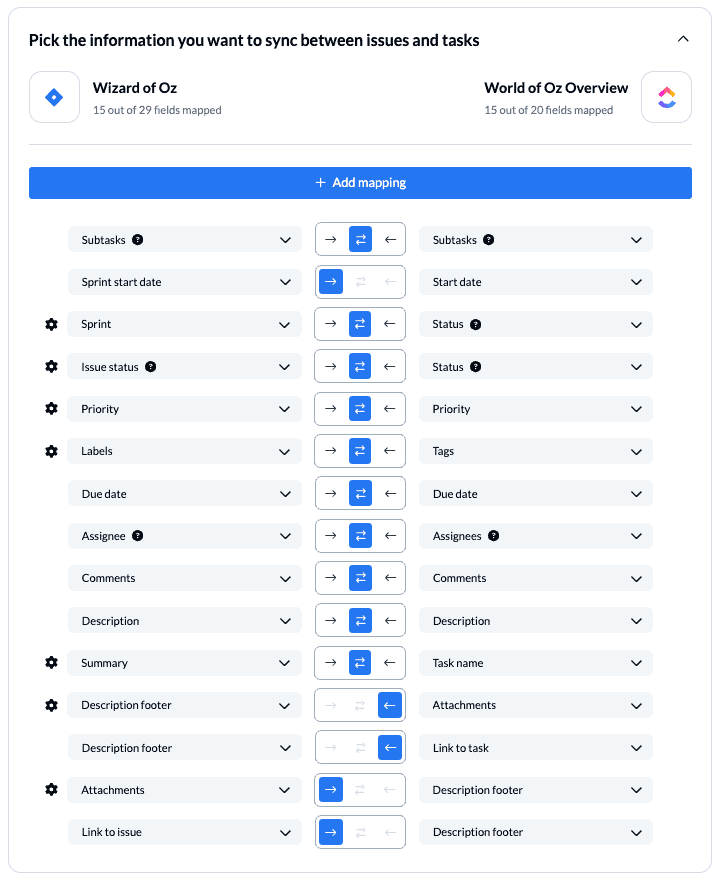
Any symbol with a gear icon indicates fields with single-select or multi-select options that can be paired together between ClickUp and Jira:
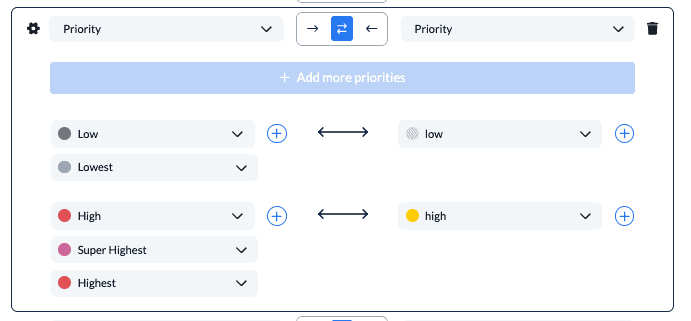
You can add additional mappings by selecting +Add Mapping, then Select a field in both tools to pair the fields together.
Click Confirm to proceed.
Find out more about setting field mappings.
Save, close, and launch your flow!
And that’s it! You’ve just built a flow between ClickUp and Jira. Congratulations! If you haven’t removed the creation date filter from your rules, you can test your flow with a new task or issue to make sure you’ve created the 2-way ClickUp-Jira integration you expected.
If you followed the steps above, your flow will now automatically create new Jira tasks based on specific ClickUp tasks and vice versa, while keeping our paired fields up to date in both tools.
If you have any questions, please don’t hesitate to reach out and let us know.